How to propagate hoya obovata? [Explained with pictures]
Do you ever think of propagating your hoya plant to increase them in number? It may look very complicated to you. But it is actually very easy to propagate your hoya obovata.
Hoya obovata can be easily propagated in soil or water. Just cut the stem from a mature plant having at least 3 leaves on it. Remove 2 leaves from the bottom of the stem and place the stem in water or soil in a pot, and take proper care of the plant. That’s all one has to do to propagate hoya obovata.
Hoya obovata will appear with its unique leaves and flowers that will make a special appearance in your house or garden. Now let’s discuss the process in more to know in detail.
Plant Overview
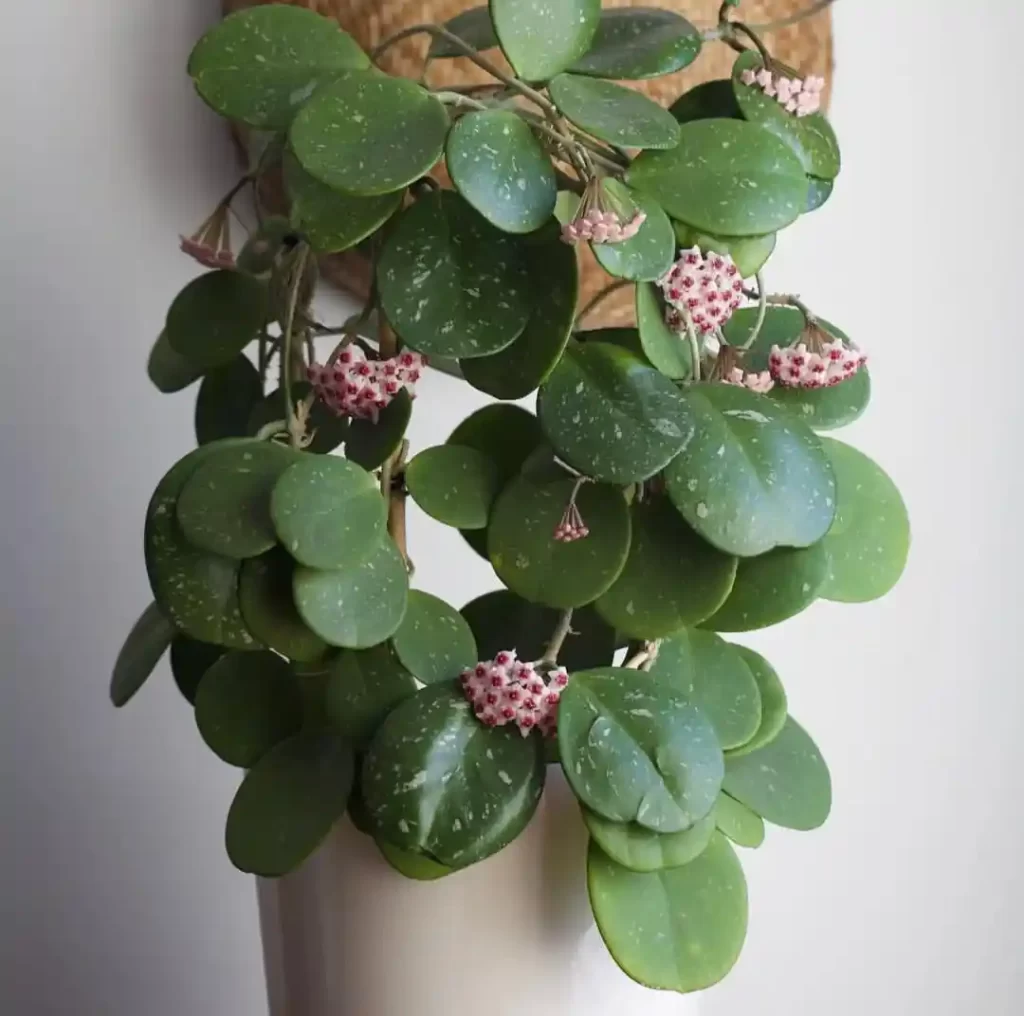
Hoya obovata is always chosen as a house plant because of its unique appearance. Take a quick view of some basic characteristics of it here.
| Common name | Hoya obovata, wax plant, heart-leaf hoya |
| Native | Asian countries (Indonesia, India, Thailand, Malaysia, etc.) |
| Family | Caryophyllaceae. |
| Foliage type | Deep green with silver splashes. |
| Mature size | Can grow 12-20 ft. in length. |
| Time of blooming | Spring, Summer |
| Color of flower | Light pink, White. |
How do I know if my hoya obovata is ready to propagate?
Are you not sure if your plant is ready to propagate? Then take a look at some points to get assurance that the plant is ready to propagate before getting to the propagation method:
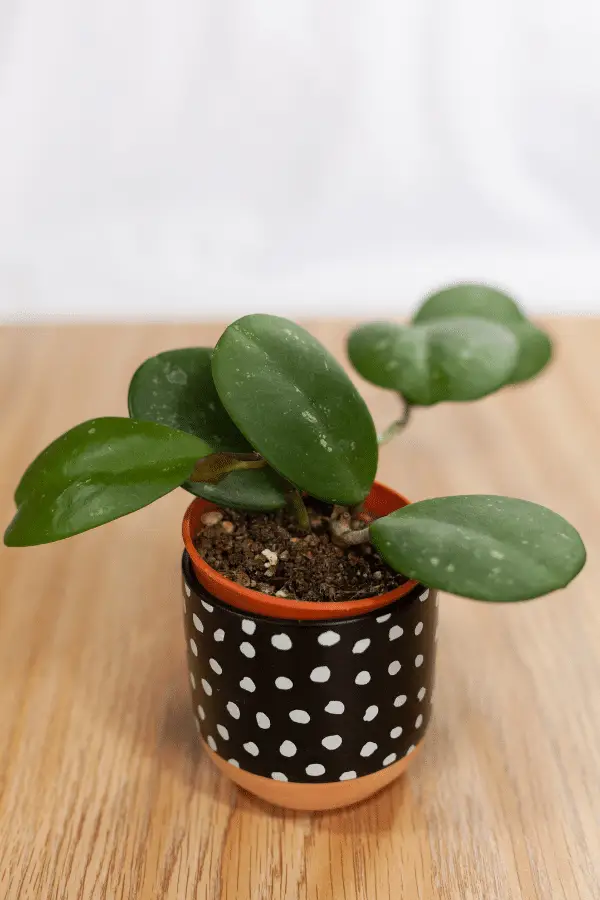
1. Healthy Growth: The plant will be at least 10 to 12 feet tall when it gets mature. The mature plant will have thick and leathery leaves with a waxy finish. The leaves will be ovally shaped. It will also have a silver splash on its foliage. Then it is ready to be propagated.
2. Rootbound Condition: This plant has a natural tendency to get root bounded. If the root of the plant is formed into a dense in the soil that there will be little space for further growth meaning it is root bound. Then you can propagate it.
3. Maturity stage: If you can see the roots coming out of the water drainage holes of the pot, then it needs repotting. And at this stage, it can be propagated.
4. Root rot condition: If you see the roots getting white-grey and damped because of the overwatering, it’s time to propagate the plant.
5. Watering condition: you may find that the soil dries faster than before. So you need to water the plant more often than before.
Here are the steps from which we can know the proper time to do propagating the plant as well as repotting.
Tools you need and their usage
| Tools | Usage |
| Sharp cutting tools | A sharp cutting tool like cutting scissors or, a knife and they have to be disinfected to avoid improper or damaged propagation systems. |
| Water pot | It is used in the water propagation method to do the rooting of the cuttings into the water. |
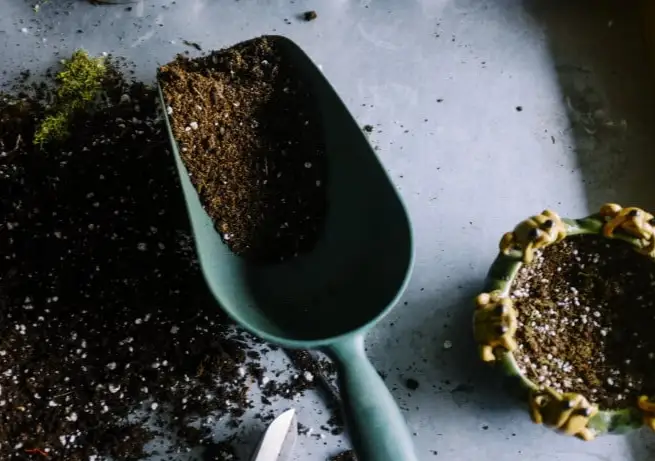
| Mixing/Soil pot | A mixing pot is needed in which the soil can be ready by mixing the suitable soil and fertilizer accordingly for soil propagation. |
| Watering can | A water can is used to keep watering the plants after a certain time to avoid the soil from drying out completely. |
| Hanging rope | It is used to hang the plant if it is required for proper sunlight or if the homies want to decorate the house with the plants. |
Hoya obovata propagation methods
Hoya obovata is very easy to propagate. So, it is very popular as house plant. It is also a cost-efficient propagation. Hoya obovata can be propagated by several methods. Among them, the most common methods are –
- Stem cutting propagation.
- Root division propagation
Now, these common methods are described below to make the propagation system easily understandable to all –
Stem cutting propagation
The first and one of the best ways to propagate a Hoya obovata plant is the stem cutting method as it is the easiest and cheapest method. It can be done in a few steps. These are-
Step-1: Cutting a stem from a mature plant
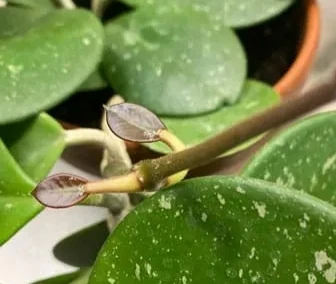
First, select a mature hoya obovata plant and cut a healthy stem about 5 to 6 inches long with a few leaves (at least 3 or 4 leaves) with sharp and disinfected cutting scissors or knife.
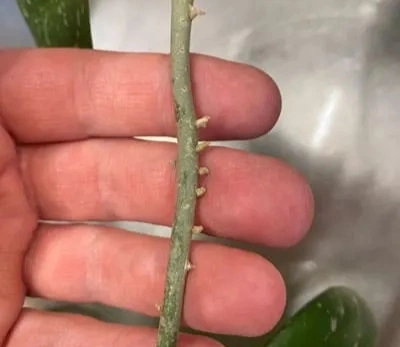
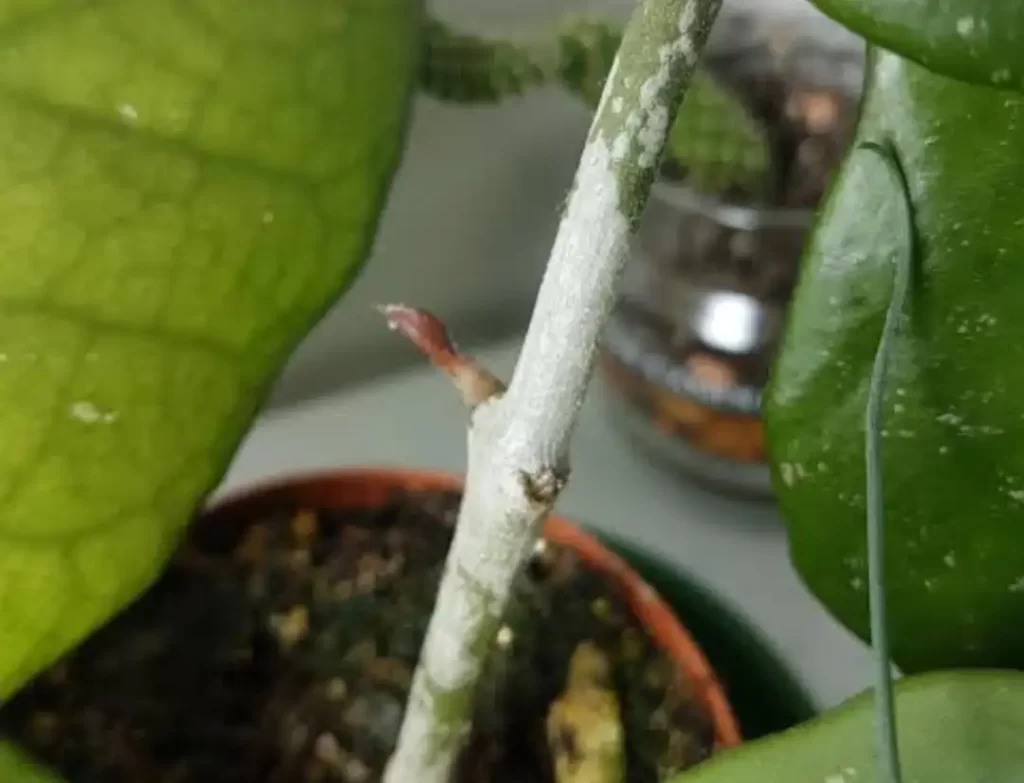
Step-2: Exposing nodes
Then remove two or more extra leaves from the bottom of the stem. After removing the leaves, nodes will be exposed to these places. The nodes are the places from where new leaves will grow from the stem after propagation.
Step-3: Placing the stem into the mixing pot
After that, take the cutting stem and place the nodes into the mixing pot in which the new plant will be propagated. The pot should be prepared according to the way of propagation whether it will be soil or water propagation.
Step-4: Coming out of new leaves
Then place the cutting to the soil and keep waiting for the new leaves to come out after the propagation is done.
Division propagation method
The division propagation method is as easy as stem cutting methods. In this method, one has to separate a piece from a mature hoya plant and place it in water or soil and keep waiting for rooting. But it is not used much compare to stem cutting propagation.
Again, the above two methods (stem cutting or, root division) can be done in two ways. They are –
- Propagation in water.
- Propagation in soil.
They are described below for better understanding-
Water propagation: Water propagation is the most used way of propagating a hoya obovata because one can also easily do the propagation with just a glass of water. In this method-
Step-1: Placing the cutting into water
You have to take the previously cut stem and place it in the pot containing water where the plant will be rooted for further propagation.
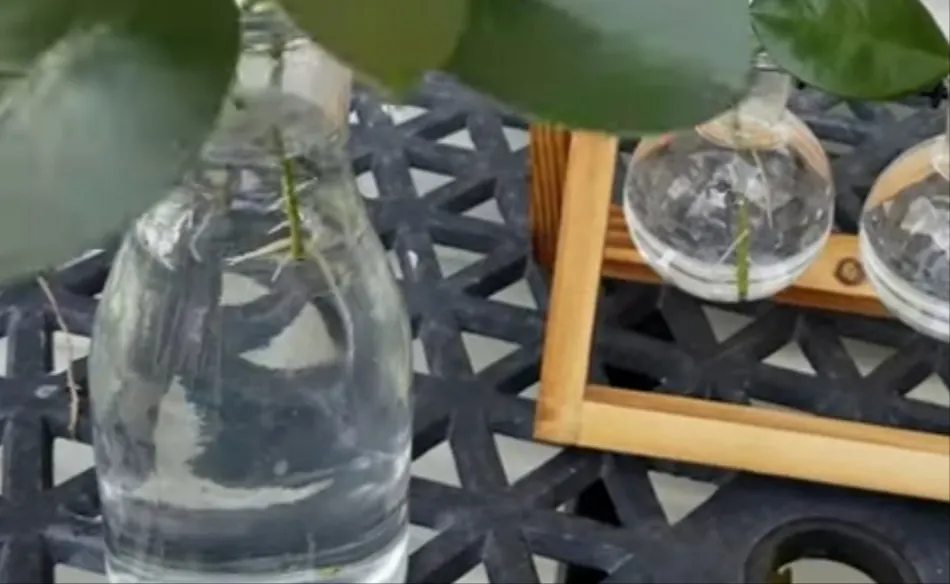
Step-2: Waiting for rooting
The cutting should be placed in such a way that the exposed nodes from where you removed the leaves will be under the water so that the rooting can be done after a certain time.
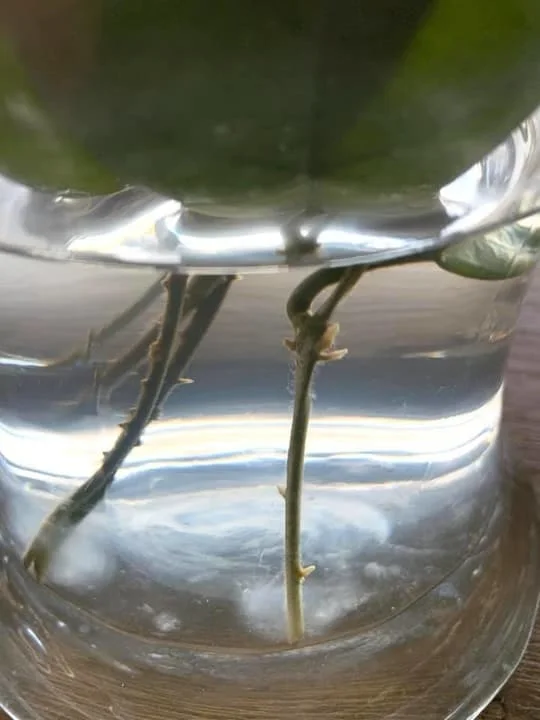
Step-3: Roots are coming out
Then keep changing the water once a week and keep fresh water till the rooting is done. It can take 3 to 4 weeks to complete the rooting.
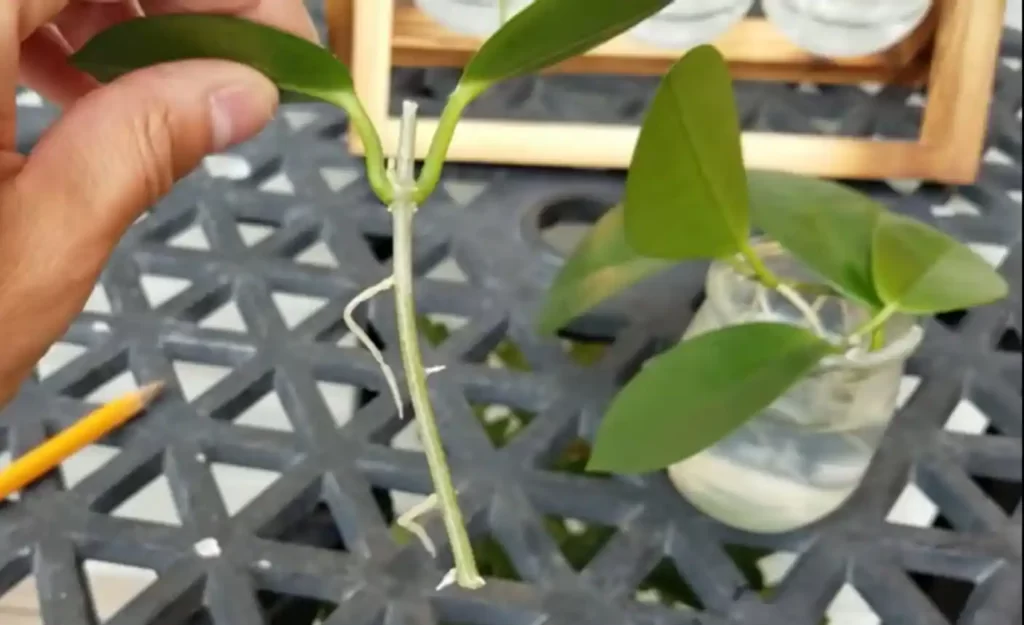
Step-4: Place them in the soil
After the roots come out and become 1 or 2 inches long, take them out immediately from the water pot and place them in the soil into a pot. You should not leave the cutting in the water after rooting for a long time or else, it will damage the rooted stem and the plant will not be propagated properly.

Soil propagation: Soil propagation can be done both directly after collecting the cut stem or after the water propagation is done. In this method-
Step 1: Preparing soil
Firstly, you have to prepare the propagation pot with proper soil and fertilizers. For that, the normal garden soil is not suitable as they are epiphytic plants. The proper soil can be made by mixing the succulent or, cactus soil with the pumice in a ratio of 2:¼. This type of soil has a good drainage system which is necessary for the soil propagation of hoyas.
Step 2: Using rooting hormone
In the case of direct planting in soil without water rooting, you can use garden-safe rooting hormone for rooting the cut stem.
Step 3: Placing the cutting to the soil
Then place the cutting to the soil and keep waiting for the new leaves to come out after the propagation is done.
Step 4:Watering the soil
Then, keep watering so that the potting mix/soil doesn’t get dry out fully when the cutting is rooting. Finally, almost after 1 year, the stem will be a mature small plant after propagation.
There is also another propagation method by using a moss/perlite mixture or LECA which is getting popular in recent times. It is also one kind of soil propagation. In this method-
You can simply do the soil propagation by using a moist moss/perlite mixture with a little bit of worm casting in the soil. You have to cover them with a plastic bag or, in a plastic propagation box to retain the moisture.
LECA or clay pebbles can also be used to root the plants. But it is not preferable for a permanent plotting system. But it can be used to root the cuttings before transferring them to the soil. You can also use them to increase the humidity level for faster propagation by keeping them in a cup filled with water.
However, one can propagate the Hoya Obovata plant very easily by following any of the methods and ways that are described above. Then, all you have to do is to keep patience and wait for your hoya obovata to mature and bloom
Precautions during propagation
Though the propagation of Hoya obovata is very simple and easy, some precautions have to be taken care of-
1. The cutting scissors or the knife should be sharp enough to cut the stem from the knife smoothly.
2. The cutting scissors or, the knife should be disinfected so that the cutting stem should not get affected by any kind of bacteria.
3. The cutting stem has to be at least 5 to 6 inches long with a minimum of 2 or 3 leaves on it.
4. The leaves should be removed from the bottom of the stem. It should not be removed from the top of the stem.
5. The stem should place in the water in such a way that the exposed nodes will be under the water for rooting.
6. The water used in the propagation should change at least once a week to give fresh water to the plant.
7. We have to keep in mind that the soil used in the propagation should not dry out completely. So we should check and water the plant accordingly.
Tips to take care of newly potted plant
Hoya obovata needs very little ongoing care. Still, some special care should be taken to the newly potted Hoya obovata for proper growth and maturity. They are –
1. Location with sunlight: Hoya obovata needs uniform bright light to grow. But if you grow them outdoors, you have to keep them away from direct, and excess sunlight to prevent sunburn. Again, indoor, the plant has to keep to the brightest area like the sunny south-facing window.
2. Types of soil: The well-draining, airy soil mixes are the best for hoya obovata plants as they need good drainage.
3. Water: Hoya obovata is very sensitive to water. So we should take care of avoiding overwatering and less watering depending on the environment and atmosphere.
4. Temperature and humidity: Hoya obovata can grow in regular household temperature and humidity, as they are epiphyte in nature, and humidity is not a requirement. But we should keep them away from extreme temperatures.
5. Fertilization: Hoya obovata needs regular fertilization ( approximately twice a month) during the spring and summer seasons as they grow faster in these seasons. For foliage growth, we should use fertilizers that are high in nitrogen. Again, when the blooming time comes, change the fertilizer containing a high amount of phosphorus for better blooming.
6. Control pests: Sometimes few pests attack the healthy hoya obovata plants and these are – whiteflies, mealybugs, scale insects, etc. To control these pests, we should use insecticides or neem oil or a mild soap water solution by spraying them on the plants.
7. Control common problems: Though Hoya obovata grows very easily, it may face some problems or diseases like leaf drops, stem dieback, root rot, absences of flowers, etc. due to improper care and precautions. To avoid these problems we have to take very special care and precautions for healthy and blooming plants.
Final thought
The beautiful hoya obovata with its flowers may be attractive to all. The caring procedure is also not so tough. So, one can easily propagate this plant in his house to increase the beauty of his house. He just needs to take little care of the plant to avoid damage.
This plant will give a fresh feeling to your mind and your house as well. So, give it a try to propagate this beautiful plant to decorate the house.
![How to propagate Monstera Albo? [Both soil & water medium]](https://diaryforgardening.com/wp-content/uploads/2022/04/Monstera-Albo-Propagation.jpg)
![Can I propagate Pothos in water? – YES [here’s HOW]](https://diaryforgardening.com/wp-content/uploads/2022/02/Pothos-Propagation-in-Water.jpg)
![How to propagate Cylindrical Snake plant? [Two methods-both water & soil]](https://diaryforgardening.com/wp-content/uploads/2022/04/Cylindrical-Snake-Plant-Propagation.jpg)